


As an Italian-American girl, I've always wanted to make homemade pasta. I had visions of cracking eggs into a flour and then effortlessly handling the mixture until it became long ribbons of pasta. That didn't happen. Before we continue on that topic, I have to insert that not only is fresh pasta delicious, it’s also macro-friendly! Each serving has 192 calories, 16.8 grams of carbs and 4.9 grams of protein. So it's worth making and makes even a standard red sauce taste fantastic.
Eventually I took a cooking class from an Italian woman from Italy and it was a game changer! Turns out there are a few laws of pasta making that must be followed. To not observe them means failure each and every time. This blog post will have a lot of details. Don’t let the details intimidate you. I’ve extensively described the process so that your attempt doesn’t end up in the trashcan.
Let’s review the laws of pasta making before we go any further into the recipe.
INGREDIENTS
The list is easy: large eggs that are store bought. Store bought so we have approximately the same amount of liquid grams in each egg. You can use difference sized eggs once you master how the dough should look and feel but for now, buy those standard eggs from the grocery store.
00 pasta flour. The brand doesn’t matter but the 00 gauge does. All-purpose American flour has a slightly different grinding gauge and won’t give us the silky yet toothsome pasta we’re striving for.
That’s it. It literally is just 2 ingredients. On occasion a drop or 2 of water is needed but with proper kneading, you shouldn’t need that. No pun intended.
EQUIPMENT
While nonnas have rolled pasta dough by hand for centuries, that takes quite a bit of rolling technique. Let’s leave that to the seasoned professionals. We’re going to use either a pasta roller or a Kitchenaid attachment. I use a Kitchenaid attachment at home and love it. It’s electric and makes it easy for 1 person to roll the dough out without a cohort. I’ve also used the hand crank pasta roller and that works well also. Both produce exactly the same results and the technique is the same.
THE LAWS
Avoid flour when mixing the dough: Use the recipe below and avoid adding more flour. The dough will start out looking overly dry and you'll fear it won't come together. Or it'll be sticky and tacky when you stir it up. Don't worry. When you dump it onto the counter and begin kneading it, it’ll get smoother and more supple. During kneading, if after a couple minutes it’s still super sticky, add about a 1/4 teaspoon of flour and continue kneading.
Alternatively, if the dough is so dry that after a couple minutes of kneading it doesn’t come together at all, add a couple drops of water and keep kneading.
I’ve never added more flour or water to the dough and it always comes out fine. The real secret is to just scrape the sticky bits off the counter and your hands, add them into the dough and keep kneading. Don’t give up!
Kneading: Knead the dough for approximately 3-5 minutes. The more experienced you are with kneading dough, the faster it'll get done. Timing doesn’t matter, the final ball does. The dough is finished when it’s soft, cohesive and no dry bits of dough are in the ball. I think it feels like soft, buttery leather. (How to Knead: Use the palm of your hand to push the dough away from you. Then fold it over and repeat.)
Resting: Cover the dough with plastic wrap or an inverted bowl and allow it to rest on the counter for 20 minutes.
Rolling: Cut the ball in half (for 2 servings) or quarters (for 4 servings) depending on how much pasta you’re making. Keep one section uncovered and cover the rest so it doesn’t dry out. Sprinkle the counter with flour and flatten the dough. Then flour both sides really, really well. Remember when I said not to add flour during the mixing stage? That rule doesn’t apply here. You shall flour and flour well! Then set the roller to the thickest gauge and bring it through. Flour both sides really well again. Set the roller back to the 2nd thickest gauge and pass through the machine. Flour both sides really well and repeat this until you get to the thickness you like. Flour each time before passing through the pasta roller. I like to go to number 5 on the Kitchenaid and number 6 on standard hand crank version. See “Dry” below. And continue with your other pieces of dough.
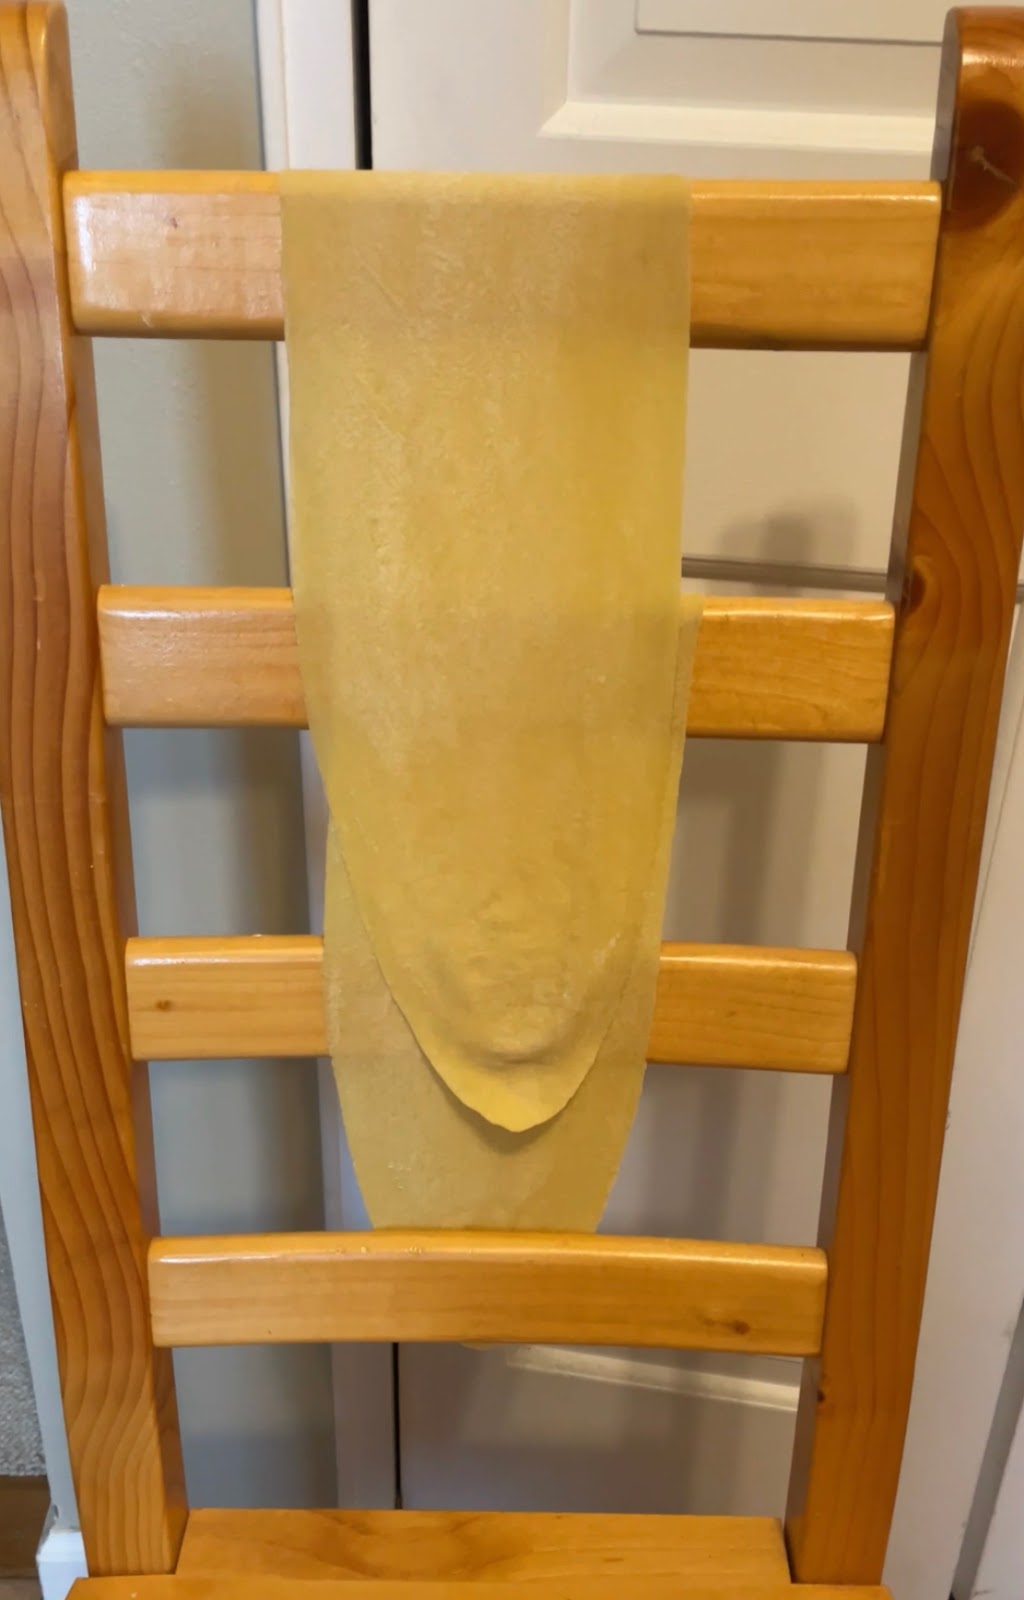
Dry: Hang that pasta and allow it to dry for 10-20 minutes. The amount of time varies depending on the humidity in your kitchen. It’s easier to cut pasta that’s a little bit dry on the surface but we don’t want it to dry all the way through or have it too brittle. The edges should feel dry but the dough itself will still have some moisture. The sheets shouldn’t look brittle.
If cutting by hand - Let the dough dry for approximately 10 minutes and flour it very well on both sides before cutting. The reason: when hand cutting you want a softer dough that you can roll up to cut.
Cutting: You can hand cut the pasta or put it through a pasta machine. Flour both sides really well and run it through the cutter. Then flour a plate and add the recently cut dough. Flour the pasta you're adding to the plate really, really well and continue. Don't cover the cut pasta. Once that pasta is all cut you can either freeze it, cook it or leave it out, uncovered until you're ready to cook. While not conventional American wisdom, most Italians leave their fresh pasta uncovered on the counter for a few hours before cooking and it's still safe to consume. Do not refrigerate. It’ll get too sticky and it’ll clump together in the water.
{Here’s} a quick video tutorial that breaks the steps down.
RECIPE
Per serving: 192 cals | 2.4F | 16.8C | 4.9P
2 servings:
90g 00 flour
1 large egg
Add the flour to a bowl. Add the egg and stir with a fork. Continue stirring what’ll look like a dry, craggy, awful dough. Use the fork to mash the egg into the flour if you have to. At this stage the object is to get all the flour into the egg so you have an awful looking ball. Once that happens, dump onto a counter and proceed with the kneading step above. If things aren’t coming together after a couple minutes look at the prior point “Avoid flour when mixing the dough” for guidance.
4 servings:
360g 00 flour
4 large eggs
Add the flour to a bowl. Add the eggs and stir with a fork. Continue stirring what’ll look like a dry, craggy, awful dough. Use the fork to mash the eggs into the flour if you have to. At this stage the object is to get all the flour into the egg so you have an awful looking ball. Once that happens, dump onto a counter and proceed with the kneading step above. If things aren’t coming together after a couple minutes look at the prior point “Avoid flour when mixing the dough” for guidance.
Comments
Post a Comment